

Dealing with leaks can be a stressful experience, but having the right solutions handy can make all the difference. In this guide, we’ll explore ten effective methods for handling emergency leak repair with confidence and ease. Whether it’s a dripping faucet or a burst pipe, these tips will help you manage the situation like a pro.
1. Identifying the Source of the Leak
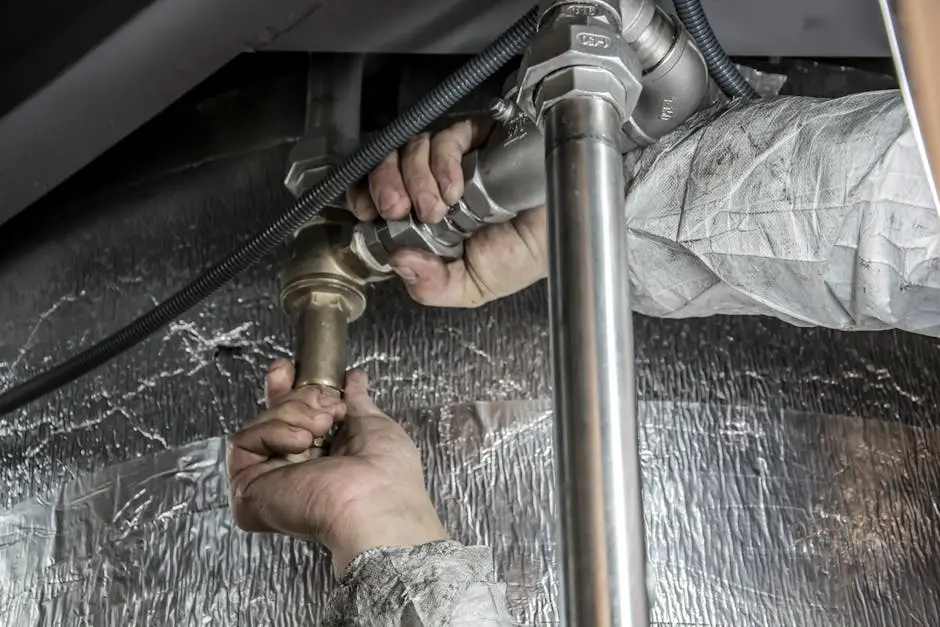
Before you can repair a leak, it’s crucial to determine where it’s coming from. Carefully inspect your plumbing to locate the origin, as this will dictate your next steps. Start by checking the most common culprits such as under sinks, around toilets, or in basements. Use your hands to feel for moisture around these areas. Sometimes, listening carefully can also reveal telltale drips. Once identified, clear the area around the source to prep for repair.
After identifying the source, assess whether it’s a major leak or minor seepage. For instance, a small puddle or slight dampness may indicate a minor problem, while a continuous flow of water often signals a more urgent issue. Knowing the severity helps in deciding whether you can manage it with simple DIY methods or if you should seek professional help promptly. Remember, a stitch in time saves nine.
2. Using Pipe Sealant Tape for Quick Fixes
Pipe sealant tape, commonly referred to as PTFE or plumber’s tape, is an invaluable tool in leak repair. This thin white strip is the secret weapon to easily manage minor leaks. Wrap it tightly around the threads of the pipe connections. The tape fills any gaps and creates a watertight seal that can temporarily hold off leaks. Ideal for securing pipe fittings in a flash, this tape should be a staple tool in every household.
This tape is not only effective but also incredibly user-friendly. However, while applying, ensure the tape overlaps slightly for the perfect seal. Simply turning off the water, cleaning the pipe surface of dirt and oils, then wrapping the tape provides a quick, reliable hold for minor hissing around joints. While it isn’t suitable for high-pressure leaks, it offers immediate relief for moderate issues until professional help arrives.
3. Employing Epoxy Putty for Temporary Repairs
Epoxy putty is a versatile tool catered to rapid and temporary repairs. Known for its adhesive power and durability, it can seal cracks and holes in various plumbing materials. This putty works under wet conditions, adhering to PVC, metal, and even fiberglass. To apply, simply knead the putty with your fingers until it’s a uniform color, then press it firmly onto the leak. The mixture will harden quickly, providing a strong bond and a temporary fix that can hold water at bay before a more permanent solution is applied later.
It’s crucial to clean the leaking surface thoroughly before application to ensure that the putty adheres properly. Although it sets fast, giving it some time to cure will yield a stronger seal. This temporary repair buy you precious time before needing to replace the damaged pipes or call in professional assistance—fundamentals particularly vital for those pesky leaks that appear in inconvenient spots.
4. Clamping the Pipe for a Secure Hold
Pipe clamps provide a steadfast solution for leak emergencies. They consist of a metal band and a screw that tightens to compress the band around the pipe, effectively stemming the flow of water. To use a clamp, ensure you first wrap a rectangular piece of rubber or suitable material around the leaking area. Position the clamp over the material and tighten the screw to apply pressure. This method works well for both metal and plastic pipes, giving a temporary yet secure hold that can control the situation until you can conduct more permanent repairs or replacements.
5. Applying Waterproof Patch and Seal Tape
Waterproof patch and seal tape presents an effective countermeasure for leaks. Unlike regular tape, this variant is specifically engineered to expand and contract along with the pipe material, offering fantastic resilience. To apply, cut the needed length and press it firmly onto the clean, dry surface, ensuring an airtight seal. This proactive tape is particularly advantageous for its ability to adhere to damp surfaces, making it ideal in unexpected leak scenarios. Its usage extends beyond plumbing, aiding in sealing leaks across various surfaces with reliability.
6. Utilizing Rubber Tape Wrap for Extra Protection
Rubber tape wrap provides an excellent barrier for areas experiencing pressure leaks. This self-fusing tape bonds with itself, creating a strong, impermeable barrier. Apply it by stretching the tape to the point of elasticity, wrapping it over the leak multiple times. It serves as a pressure-resistant gasket that can endure higher pressures than typical tapes. Although it forms a robust seal, be sure to apply sufficient layers evenly to maximize its protective capabilities.
7. Turning Off the Water Supply Immediately
One of the most critical steps when addressing a plumbing leak is to immediately shut off the water supply. This foundational move helps minimize water damage and gives you a calmer environment to deal with the situation. First, try turning off the valve nearest to the leak; however, if the issue persists, accessing and closing your home’s main water valve might be necessary. Knowing these valve locations in advance is immensely beneficial, as is educating your household members about their operation.
Turning off the water supply effectively reduces the urgency of any uncontrolled leak. Even if water remains pooled or dripping, it halts the volume flowing in, preventing further catastrophe. This step should be synonymous with basic plumbing safety in any household, underscoring its importance in your preventative care regimen.
8. Creating a Temporary Patch with Hose Clamps
Hose clamps, when paired with a section of rubber or plastic, can create a reliable, immediate patch. Start by wrapping a pliable piece of material, like rubber sheeting or an old bike tube, around the leak. Next, secure this matting with a hose clamp, tightening it to close the breach. This hasty yet effective patch mitigates further water loss and lets you evaluate the leak at a more convenient time. It offers a simple, effective way to stave off escalating damage.
9. Seeking Professional Plumbing Assistance
While do-it-yourself solutions provide quick relief in emergencies, knowing when to bring in professional plumbing assistance cannot be understated. Licensed plumbers not only provide permanent solutions but prevent future catastrophes caused by incorrect installations or temporary fixes. A professional assessment ensures that your plumbing system runs smoothly, addressing both the symptoms and root causes of leaks. Their expertise and experience can save you time, effort, and potential water damage costs in the long run.
Plumbers can also offer preventive maintenance tips and upgrades to reduce the likelihood of recurring issues. For comprehensive services and expertise, you can explore our plumbing services which are specially designed to cater to all your plumbing needs efficiently and effectively.
10. Keeping Essential Tools and Materials Handy
Being prepared is half the battle in emergency leak situations. By keeping essential tools and materials on hand, such as pipe sealant tape, epoxy putty, clamps, and rubber tape, you empower yourself to tackle unexpected leaks swiftly. A well-stocked leak repair kit ensures you never have to face a plumbing emergency unprepared. These tools are relatively inexpensive, easy to use, and take up minimal space in your home. By organizing them in an accessible area, you’ll always be ready to take action when required.
Regularly check your toolkit to make sure everything’s in good condition and replace any used or worn-out items. This vigilance keeps your repair resources ready for any emergency. Remember, prompt repairs with the right tools are keys to mitigating leaks efficiently, maintaining household peace, and avoiding hefty water damage bills.